Controlling lights with an IKEA Styrbar switch via Home Assistant works perfectly, but after a while, I wanted more flexibility. Instead of just turning lights on and off, I wanted a central place to control scenes, view information, and expand the system over time.
That’s why I replaced the IKEA switch with a wall-mounted Samsung Galaxy Tab A11, running Home Assistant as a fixed dashboard.
Designing a Custom Tablet Wall Mount
I first searched Thingiverse and Printables for an existing wall mount for the Samsung A11, but couldn’t find one that suited my needs. Most available mounts were either too generic or relied on snap-fit connections—joints that snap together without screws or glue—which didn’t inspire confidence for a permanent wall installation.
A custom mount was designed to fulfill these needs.
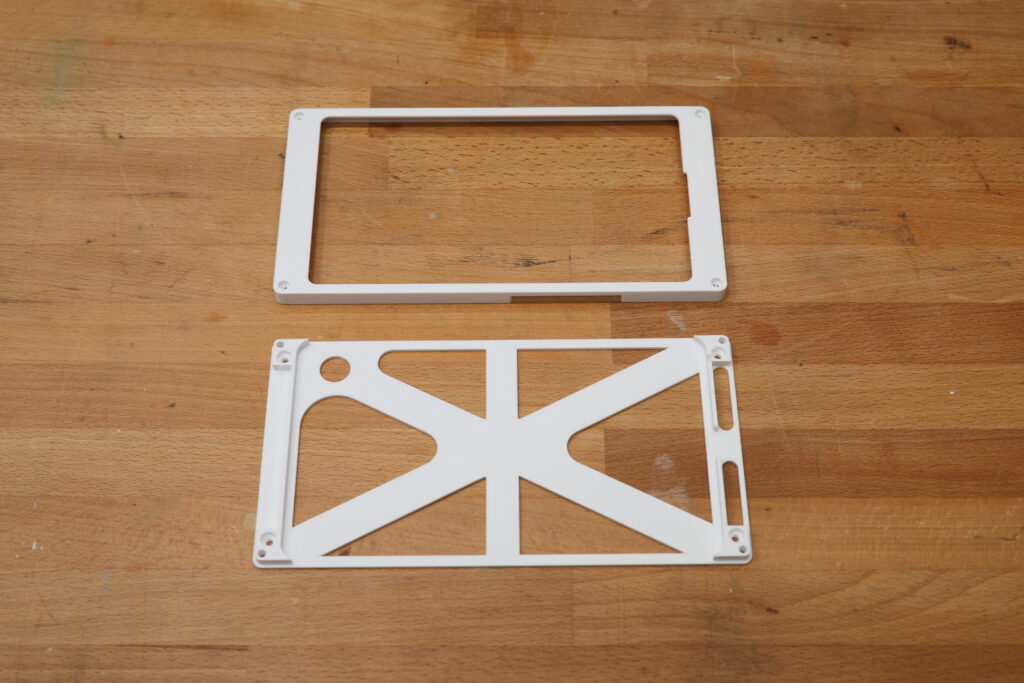
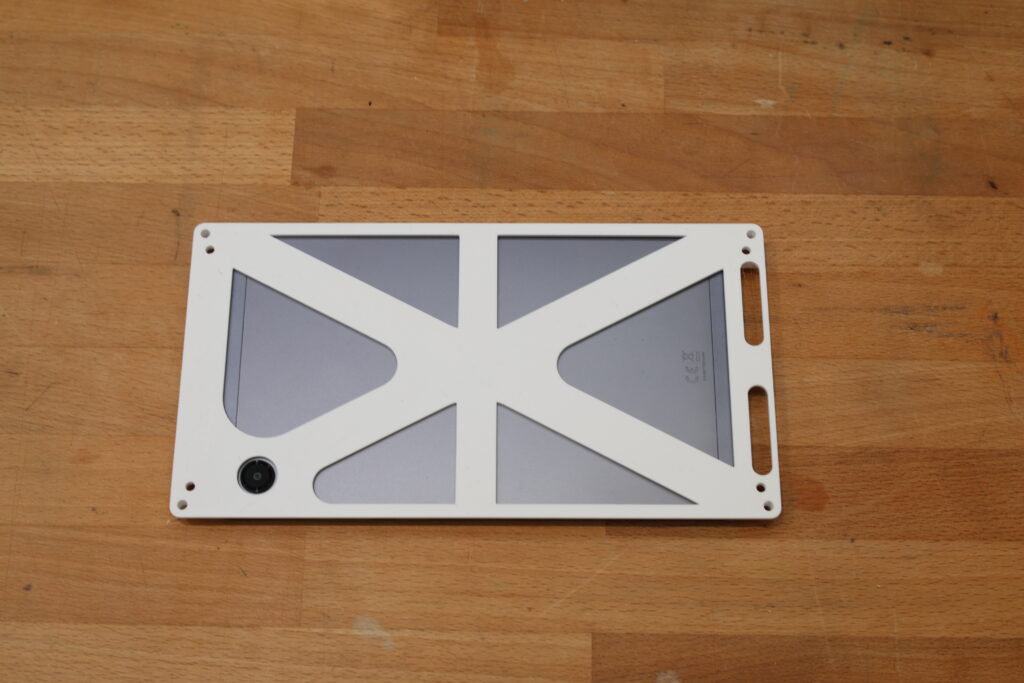
The design consists of three separate parts:
- Spacer/Extender – creates extra room for the USB cable when the wall opening isn’t in the ideal position.
- Tablet mount – fixed securely to the wall
- Cover plate – holds the tablet firmly in place and finishes the installation cleanly.
This modular approach allows flexibility for real-world installations, accommodating cables and varying wall conditions.
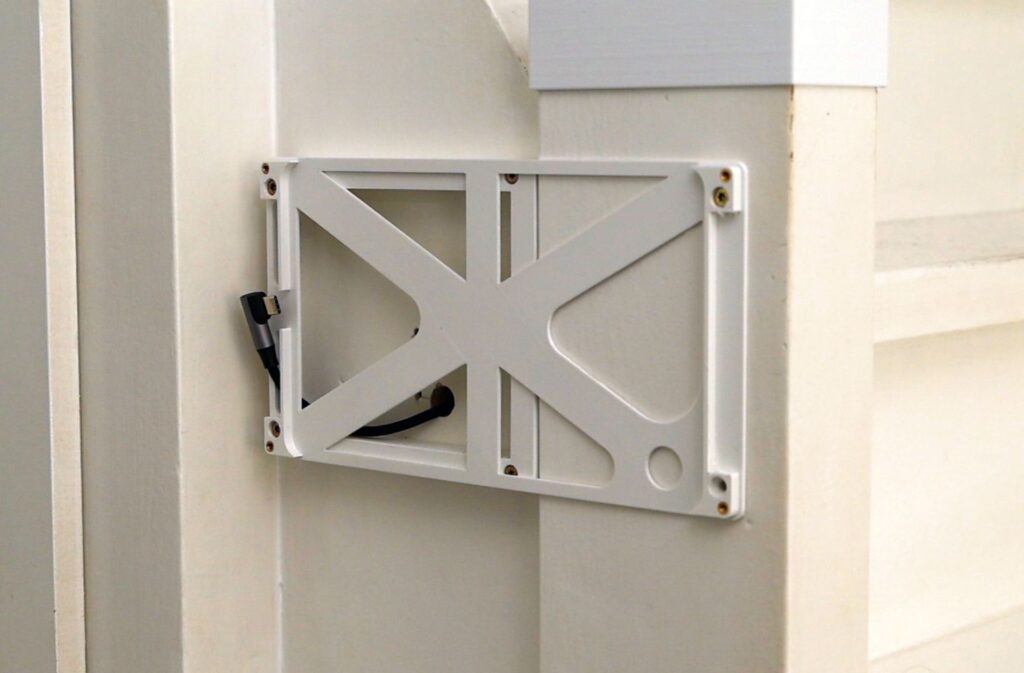
Choosing Heat-Set Inserts Over Snap-Fits
The wall-mounting bracket uses four M3 heat-set inserts—small metal sleeves that can be melted into plastic with a soldering iron—to secure the cover plate. Instead of relying on a snap-fit, I chose this approach for reliability and long-term durability.
Installing the inserts is straightforward and actually quite satisfying. With a pair of tweezers and a soldering iron fitted with a dedicated insert tip (a tool designed to melt inserts into plastic), the inserts slide cleanly into the plastic and lock firmly in place once cooled.
This produces a mount that is solid and professional in appearance.
Adapting the Design for a New Location
The initial tablet mount was designed for a different location. It was later installed on a staircase wall, requiring a new extender to attach the mount to the stairs securely.
With this extender, I first secure the base to the wall with two screws, then attach the tablet mount plate separately. This differs slightly from the original design, which mounted both parts in a single step, but it works better for this location.
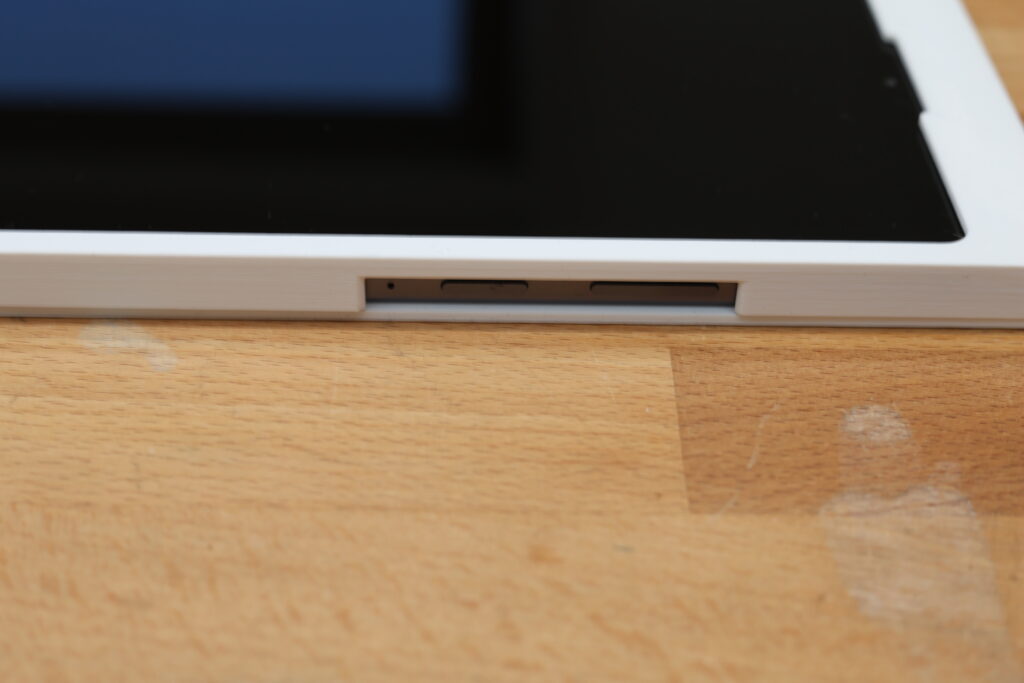
Installing the Tablet and Cable
The USB cable used features a hook-style tablet connector. It is routed through the tablet mount and the pre-drilled wall hole. This process requires attention to detail and patience.
The easiest method turned out to be:
- First, connect the USB cable to the tablet.
- Then press the tablet into the mount.
At this stage, the tablet is not yet secured. The cover plate is attached using two Allen bolts, tightened by hand, and then finalized with an electric screwdriver to ensure proper assembly.
Power and Cable Management
Inside the stair cupboard, a short section of cable duct guides the USB cable to the power outlet, keeping the setup organized and concealed.
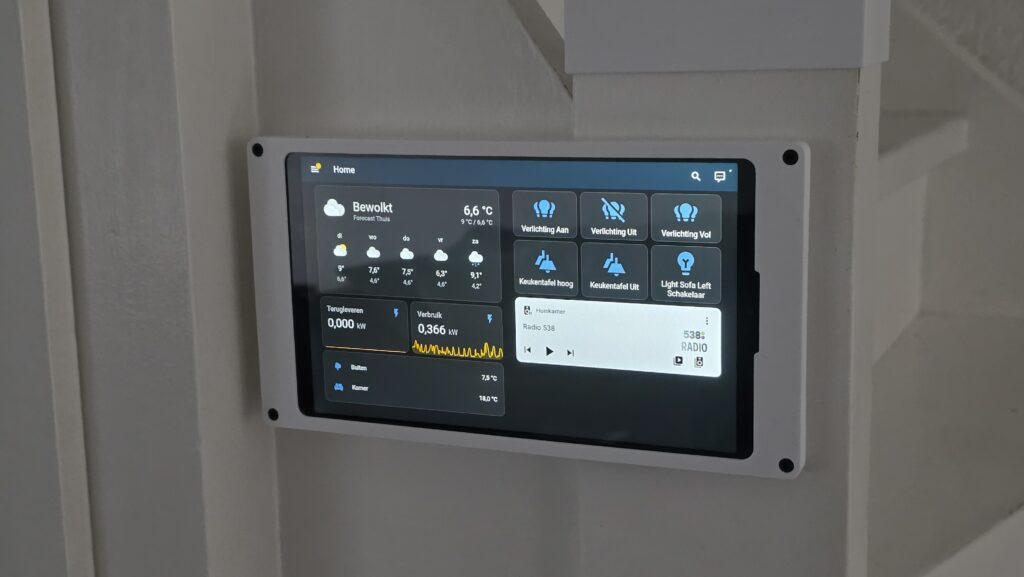
Running Home Assistant on the Tablet
Using the Fully Kiosk Browser app, the tablet runs Home Assistant as a dedicated wall dashboard. This setup allows me to:
- Turn the lights on and off.
- Control scenes.
- Display additional information at a glance.
- Read the battery level from the tablet.
This is the first version of the dashboard, and adjustments will be made over time to expand functionality and refine the layout.
Final Thoughts
Replacing a physical switch with a wall-mounted tablet adds significant flexibility to a smart home setup. With a custom 3D-printed mount, the installation looks clean, feels solid, and is fully tailored to the space.
Download the files on: